Configuration
Create a Sit(x) Bridge Adaptor
Login to your Sit(x) portal.

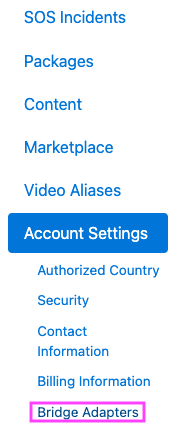
Click Admin, Account Settings.

Click Bridge Adapters
Click Create New Bridge Adapter

Name the Bridge Adapter and fill out other fields as appropriate.

Select a Group & Scope (see below) and click Authorize.

Click Back to Bridge Adapter.

Show the Secret Key and copy to clipboard.

Configure Sit(x) Node
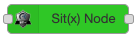
Locate the Sit(x) node on the left-hand Node Palette in Node-RED.
Drag the Sit(x) Node into a Flow and double-click to open the Node Properties dialog.

Click the Edit button to add a new sitx_config.

Update the configuration settings and click Add.

Complete!

Sit(x) Groups & Scope
In the following example, the URL for our group is https://sns.takserver.parteamconnect.com/sitx-group-5c60c609

The following elements of this URL are used for Sit(x) Node Configuration:
- Subdomain: sns
- Group: sitx-group-5c60c609
Scope is defined during Sit(x) Bridge Adaptor creation (see above). There are three options for scope:
bridge_both: Bi-directional (in & out) data with a Sit(x) Bridge Adaptor.bridge_in: Ingress/input only into a Sit(x) Bridge Adaptor.bridge_out: Egress/output only from a Sit(x) Bridge Adaptor.
When entering the Scope into the Sit(x) Node Properties dialog, do not include the leading . period in the scope, this will be prepended automatically.